Wednesday, January 25, 2012

Melting Art

I came across crayon art on Pinterest. I thought it was a unique concept, however I also thought they could look a little kiddish and well...we don't have kids. (Unless you count the monster below.)

After more searching, I saw a couple different versions where people created flowers by flipping the crayons upside down. I think the original idea came from etsy...if you're not into making crafts but like the idea just search "crayon art" on etsy for a range of options. The screenshot below was my inspiration for my second Pinterest project.


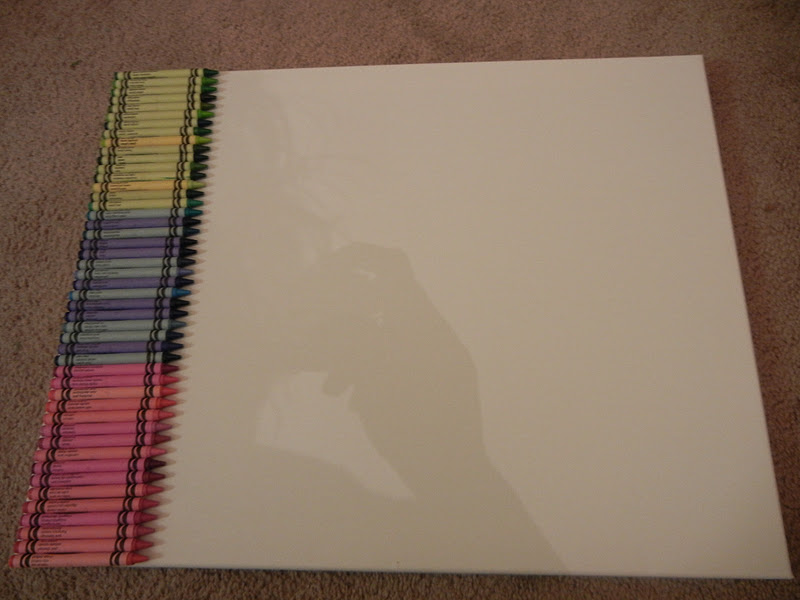
When we were at Michael's over the weekend, we picked up some more crafts. Justin found flowers made of a wicker-type string. I also picked up the biggest box of crayons I could find. Justin and I both used 40% off coupons on the flowers and crayons! We also needed a 5-pack of canvases (only $14); I figured I could find some more things to make on the other four.

First I pulled out all the green shaded crayons but soon found myself with a dilemma. There were not enough green crayons to fit across the bottom and I wanted to make it that night. My choices were to use green, brown, and yellow hues or use other colors that weren't real stem colors of flowers. I debated and decided to give the other colors a try. I figured if it didn't look good with the flowers, then I could take the art to school. I chose 3 colors: green, blue, and pink because I had 3 flowers. With the flowers being brown, I thought the contrast could work. I used a glue gun to align all the crayons and decided to hide the Crayola logo.

Then I covered a corner of the room with newspaper and put the crayons on the top, so gravity could help. Hot wax can and will fly if you're not careful.

I used a hair dryer, several sites suggested using it or a heat gun. I held the dryer over different sections until the wax started to drip. The hair dryer made it a little difficult to control the drips near the crayons; it seemed to blow lots of the colors together and I had trouble making defined lines. If I wanted a certain drip line to continue further, I simply held the dryer near the section until it began to move more.

I kept going, so there wouldn't be as much white space.

If you know me, you know I love chewy candy and I found these brand new Sour Patch Kids Berries at HEB. From reading the label and research online, I concluded they were GF. I snacked on some while I worked on my project and thought they matched my art well.

These were so delicious. I'm not sure of the exact flavors but know for sure there was a blue raspberry. I'm thinking maybe strawberry, cherry, and blackberry...but don't quote me.

I placed the flowers before I glued them to decide if I liked the final product. Although it didn't turn out as originally planned, I was happy with the results.

It hangs on the stairwell.

I think it fits perfectly with the other pictures, which by the way were mostly created by family members. The bottom left abstract piece was painted by Justin's grandmother. The flower picture above that was a wedding gift from a second cousin who also created it. The middle picture of two flowers was taken on our second anniversary of passion flowers in Fredericksburg and made into canvas art thanks to a Groupon. The "I will always love you" sign was bought on etsy for our third anniversary because it quotes our song. I think the wall is unique to us and we have a couple more ideas to expand it.

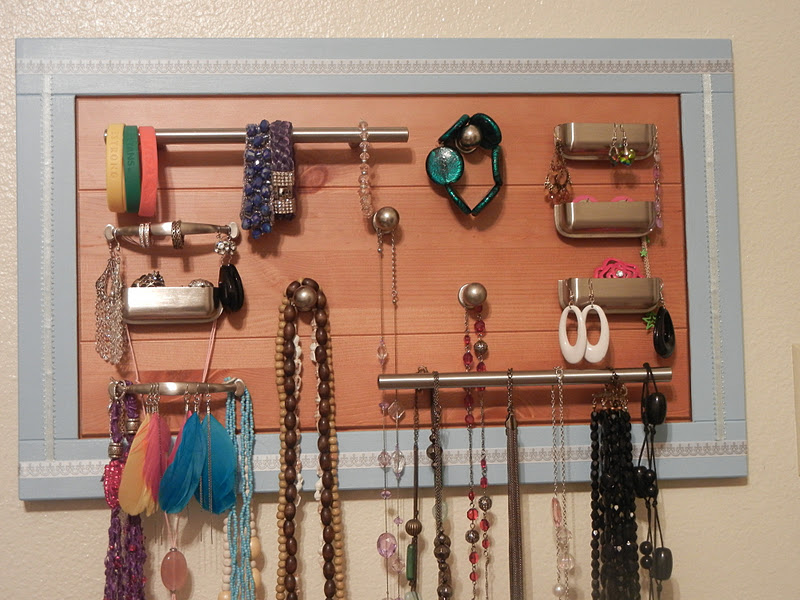
I'm trying to be a little more creative with my camera shots.

3-D art

Tuesday, January 24, 2012

Be Kind

Larabars, Luna, and Kind bars oh my!

It's always good to switch up my after school snack. Kind bars have become a new favorite. I had first tried the brand at Starbucks (which is a nice option there when you need a pick me up food). My sister, Kristen, introduced me to this flavor and it has become my go to:

Dark Chocolate Cherry Cashew

It is sweet, chocolaty, crunchy and a little bit salty.

They range in price from about 1.99 to 1.50; luckily the commissary usually sells them for a dollar each! I think it's time to branch out and try more flavors. Justin really likes the almond coconut flavor.

Monday, January 23, 2012

Pinterest - DIY

I'm finally ready to admit, like the rest of the world, that I'm totally interested in Pinterest.

My first inspiration was this jewelry board with drawer hardware. After several clicks on Pinterest, this is the best resource I can find that it originated from: here.

We had gone to IKEA a while back and I had picked up most of the materials. I found a discounted cupboard to use as the base for $4.99. I also bought numerous handles and knobs. However, it took several months to initiate the project, it must be because I've been Pinterest crazy lately. Or maybe I put it off because my hubby refused to drill them for me! He taught me how to use the drill and I had to measure them all by myself!

First, I laid out all the handles and knobs to get an idea of the configuration I wanted to create. Then I began marking dots with a pencil, so I could drill holes. I started to get the hang of it, and lined them up pretty evenly.

I finished all the drilling last weekend and held the board over my face while Justin took a picture, because if you can't tell from our clothes, it was a lounge in your sweats kind of day.

So proud of myself, now I just wanted some paint and ribbon.

This past weekend I dragged Justin to Michael's to buy some craft supplies to decorate with. I chose some Martha Stewart paint, ribbon, and a 7 cent foam brush!

 The paint took a few coats: this was after the first coat.

I think I ended up with three coats of paint and it looked great!

I also decided to add some ribbon border. The Martha Stewart ribbon was awesome, because the back side had a sticky adhesive that made it easy to put on.

The finished product is already hanging!

Now my costume jewelry is no longer tangled in a bin. 

Be prepared for more Pinterest inspired recipes and projects in the future!

Tuesday, January 17, 2012

Easy Cannoli Filling

Remember when I was served this cannoli filling?

I'm sure the version I'm posting now is not the same as above, but I'm assuming it is much easier. This was also inspired by my in-laws because they made it for us one time while we were in Michigan. 

The key ingredients: ricotta cheese, powdered sugar, chocolate chips, and cinnamon.

I found these chocolate chips at Central Market. They are made in a gluten free facility!

I scooped about a quarter of the ricotta out of the 15 oz. container. It ends up being 2 servings, which is about a half of cup.

Then I added a tablespoon of powdered sugar.

Sprinkle a little cinnamon to taste. You can also add nutmeg or any other spices.

Stir

I counted out a serving of chocolate chips. You could also add nuts or anything else your heart desires.

Stir again and enjoy!

Monday, January 16, 2012

Deep Fryer

We bought a deep fryer. 

I normally wouldn't condone this purchase, but being gluten free I could justify it. We can't go out to eat as easily to find foods that feed certain cravings. I know we won't use this all the time, but it will come in handy when I just want to have certain fried foods. Justin told me he wants me to try to make a GF paczki; I don't even know how to make a gluten filled paczki but a fryer is a step there.

We laid out bread crumbs, which were a mixture of corn flake crumbs and brown rice bread crumbs. We also added some Italian seasoning to make the breading.  Some all purpose GF flour, Cup 4 Cup, was combined with two tablespoons of corn starch. I also had to beat two eggs with a little water.

 Then I organized them in dipping order: flour, egg, and finally bread crumbs. We dipped mozzarella and chicken tenders.

Here are some chicken tenders ready to be fried!

Iivana was a good helper...she stayed out of trouble.

My fingers were ready to be fried too.

Look at that chicken

My favorite part were the mozzarella sticks.

 Cheese oozing out of the sticks and chicken, yum!

We even cooked up some french fries.

Condiments for dipping: buffalo ranch and marinara. 

Both are labeled gluten free, however the ranch is not completely healthy. Advice - eat in moderation.

Fries, chicken, and mozzarella sticks.

Served with a Red Bridge.

Of course, I don't recommend meals like this everyday, but every once in a while is a treat.

LinkWithin

Related Posts Plugin for WordPress, Blogger...